Materials:
- 2 or more squeeze bottles
- Slab mold
- 4 or more contrasting colorants
- Fragrance that does not accelerate
- A soap recipe that does not speed through thin to thick trace
- Optional extensions on the squeeze bottle tip
- Patience 🙂
Method:
- Create a variegated zig zag line of soap using squeeze bottles layered with two or more colors.
Tips and Tricks:
- First and foremost, the one single thing that would have helped me is having a familiar recipe with predictable behavior.
- I have continually tweaked and tinkered with soap recipes/ compositions, so I did not have the familiarity of one known soap recipe.
- This technique needs the Goldilocks of soap recipes: not too thin, not too thick, but just right.
- I started making 100 g mini batches of soap, making one small change each time, until I had a recipe that behaved for this technique.
- Different colorants may thicken at different rates. Antidotally green seems to thicken quicker.
- Gel phase doesn’t make all colors brighter, some colors are better not having gone through the gel phase.
- Pay attention to usage rates of micas. I wish I had doubled up on my yellow mica on my second sunflower.
- This technique is prone to soda ash, especially if ambient humidity is high.
- Avoid taking air into the squeeze bottle after use, until the squeeze bottle is on its side. This avoids allowing air bubbles to rise up through your layered colors, which causes mixing.
- When initially filling a squeeze bottle, I found it really important to pay attention to how well the colors laid on top of one another. If the colors mixed instead of staying separate, it was not at the right consistency yet.
- I started placing much smaller amounts of layered soap in the squeeze bottles for the first few layers. This of course meant the squeeze bottle needed to be filled several times, however it avoided thinner consistency soap batter over-mixing.

The Experiment 🥼🧪🧼
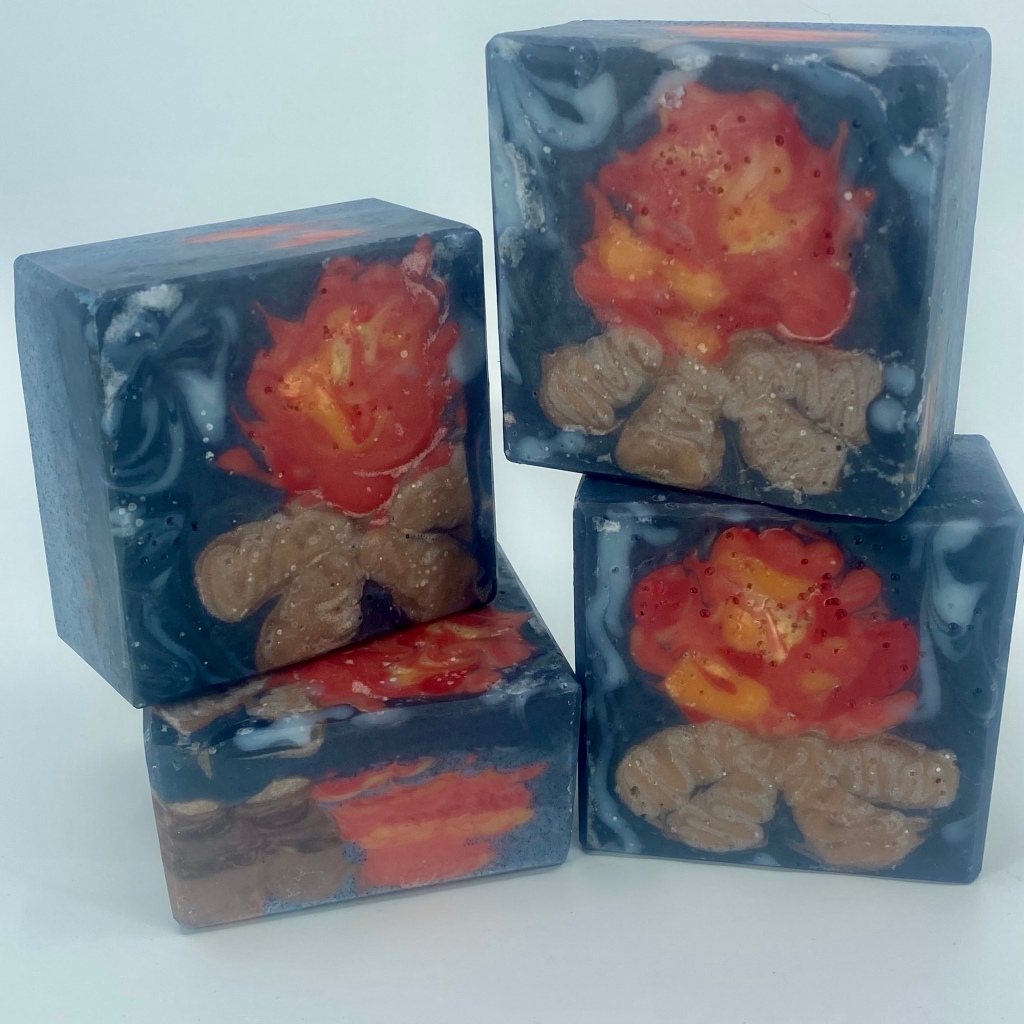
#1 Bonfire soap 🔥🧼: The very first soap I made trying this technique was very high in Oleic acid and stayed very liquid. The caps of the squeeze bottle were very small and slowed the squeezing/ design process down tremendously. I attempted to make a bonfire soap 🔥. Towards the end of squeezing (4 hours into making this soap), the batter was finally at the right consistency.


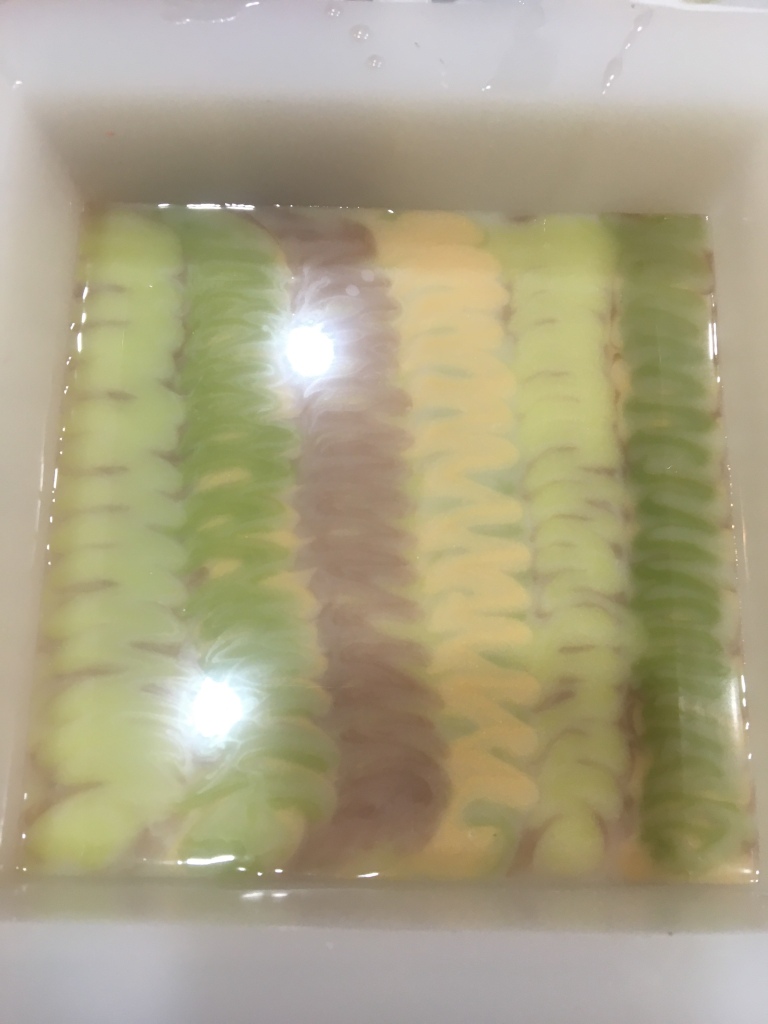
#2 Pear soap 🍐 🧼: Next I tried cutting off the tips of the squeeze bottles to speed up the delivery of the soap. I took the batter to a light trace prior to beginning to mix in my colorants, thinking this would solve the slow moving trace issues. I picked a pear scent, and a couple greens, a golden brown, gold, winter white, and yellow micas.
The recipe remained so liquid that I had to completely give up on the squiggle technique and instead made a Taiwan swirl of sorts to salvage it. At this point I realized my high Oleic acid (very liquid) recipe might be great for column pours, but certainly was not good for squiggle pours. My colors had mixed completely in their squeeze bottles. This is also when I realized that releasing pressure on the squeeze bottle while the bottle was still vertical was allowing big air bubbles in that were mixing my soap layers.
One day it may be fun to take the same recipe (100g test batch) to a medium trace and try again, but I have a feeling it may still not have that Goldilocks soap batter magic.


I read that others using high Oleic acid recipes were also having similar technical issues on the FB group. I needed to develop a new soap recipe.
#3 Many Mini-batches: To keep soap quantities manageable I started making 100 g (oil) batches, adjusting one parameter at a time. I split the batter in half, colored the two halves differently, and squeezed out single bars of soap per 100 g batch. I made several 100 g bars before I found a recipe that worked. I was able to scale the recipe up to a 200 g (oils) batch successfully, and decided to proceed with that recipe.
Ironically adding 5% castor oil (speeds trace) that gave the most significant improvement. I imagine just starting with a normal recipe and just learning to control trace first, would have saved me a lot of time and trouble.
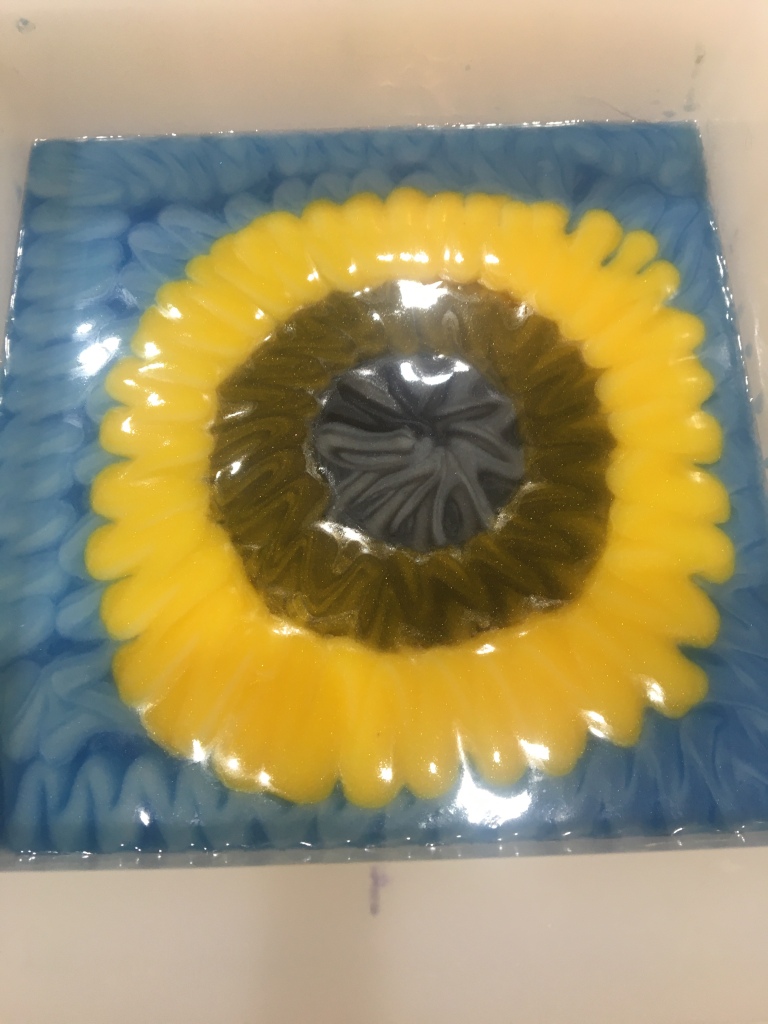
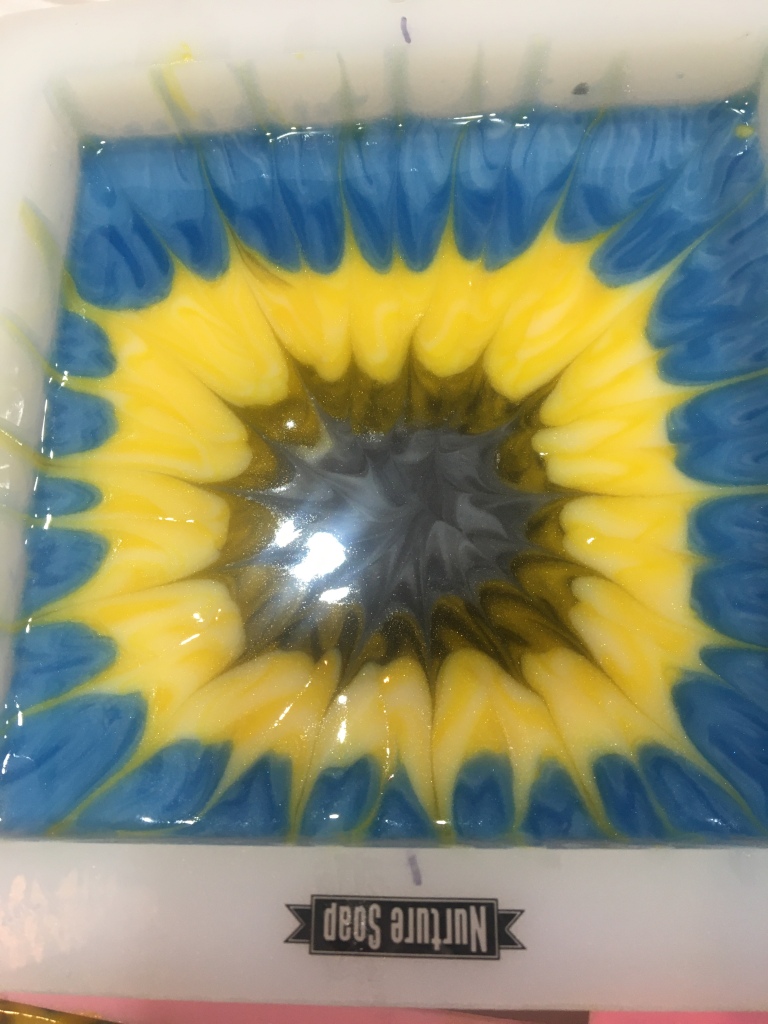
#4 Sunflower soap take one 🌻🧼: I had a bouquet of sunflowers in my kitchen, and thought I would give the design a go. Sunflowers seems to be a perennial favorite soap design, and for good reason. Sunflowers are instantly recognizable even in abstract, and never mistaken for hungry grubs 😆. I made a “full scale” Goldilocks soap recipe for my slab, and failed.

I was hand stirring my small batches, and introduced a stick blender to my “full scale” batch for only a few quick pulses. I ended up with batter that sped to medium trace and kept going to thick trace.
I knew better then introducing a new parameter (the stick blender), but honestly did not realize what an impact it would make. My batter ended up having a soft frosting consistency. My sunflower soap suffered from design issues as well as trace issues, but the thick batter made realistically textured sunflower seeds.

#5 Full scale new recipe + hand-stirring + round two on the “pear color” palette. I felt the pear palette was so seasonal for late August early September. I had to give it another try. This time I used a manly fragrance, and decided to rebrand it to male family members and friends as “camouflage” soap. 🤫


#6A Coral, Aqua, Tan, and Winter White


#6B Same exact recipe, lye master batch, oils & slightly different results. I see a reduction of Oleic acid content in this soaps future. 😆


Wow, what an incredible write-up! I love hearing all about your experiments and what worked and what didn’t! This was such a wonderful learning opportunity – so much gained! Especially a beautiful sunflower soap. 🙂 Thank you so much for sharing about all the different soaps you made!
LikeLike